

I purchased our current traditional-style leather living room furniture the year before the hubby and I got engaged, which means it’s now seen a healthy five-and-a-half years of daily use.
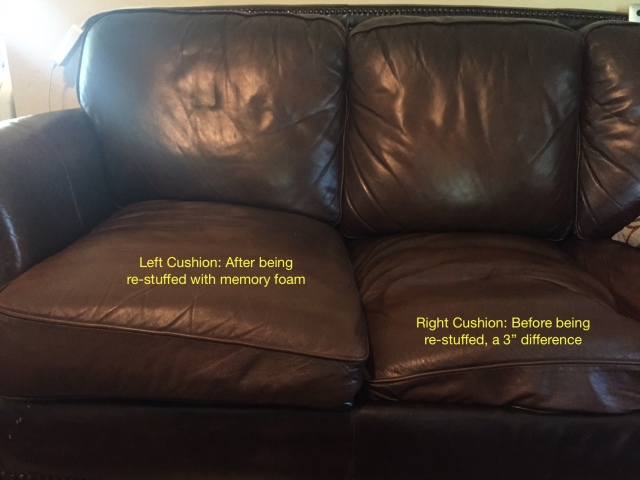
While the material itself has held up fairly well in that time, the couch cushions themselves have not — the filler material had flattened considerably, and you were starting to be able to feel the bars of the sleeper bed below, especially when you sat on the middle seat.
Although part of me wanted to just go out and buy new furniture, the more Mustachian part of my brain said we could easily get a few more years use out of this set with just a little TLC. So I scavenged the garage until I found the object of my current desire: a memory foam mattress topper we had used on an old bed.
Because we already had one, this step was free for us, but if you needed to order memory foam, it’s fairly cheap: you can get a twin-mattress size piece for under $50 on Amazon.
So I went to work, first measuring the cushions and marking out pieces the same size as the existing cushions on the memory foam, and used just regular old sewing scissors to cut through. Then, I unzipped the cushions and shoved the memory foam underneath the existing batting, making sure to smooth it out so that it would sit flat all the way into the corners.
It took a little wrangling, but in less than 20 minutes, all three cushions had been re-stuffed. Swapping out the left and right side cushions in order to make sure they got equal wear was the final step, and voila – I was done. (The finished product is the top photo.)
I can’t even tell you guys how much nicer these cushions both look and feel now — it’s almost like sitting on a whole new couch! And considering this will get us a few more years out of this living room set, I’d call that a totally worthwhile weekend project.