

If, like me, you live in the Southern part of the country then you’ve probably recently come the conclusion that “winter” is just not going to happen this year. In central Texas, the last frost date is usually sometime mid-March, and since the 10-day forecast shows balmy temps in the 60s and 70s for our foreseeable future, I went ahead and planted my vegetable garden this weekend.
The bulk of the space in my garden is dedicated to tomatoes. Four well-tended, high-yield tomato plants will eventually yield hundreds, possibly even 1,000s of tomatoes by season’s end. But tomatoes are also great because they’re a pretty easy plant for beginners.
That said, there are a few things you should know if you’re making your first foray into growing your own food, so here are a few quick tips that I’ve learned over the years.
Step 1: Prepare the Soil
If you’re planting directly into the ground or an existing raised bed, then you’ll want to work some organic matter into the soil. For our 4′ x 8’raised bed garden, I tilled the unplanted areas to the top to loosen the existing soil, then added a 20-lb bag of compost and a 20-lb bag of new potting soil and raked them all together. This will help the plants to have plenty of food throughout the growing season.
Additionally, turning your soil over allows you to watch out for what I consider the most evil garden pest of all – grubs. I hate these little assholes. They will kill young plants by eating their roots before they ever even get established. Since we eat what comes out of our garden, we try to keep things organic, and the best organic treatment for grubs is milky spore bacteria and beneficial nematodes. If you find a few grubs while working your soil, go ahead and work in these solutions before you add your seedlings.
Step 2: Watch out for “suckers”
Once your soil is ready and you’ve mapped out where your tomatoes will be placed (be careful not to to overcrowd!), then you can go ahead and plant your tomato seedling. As you do, though, be on the lookout for “suckers” on your young plant.

A “sucker” is essentially a new “branch” of your tomato plant, that grows in between the main stalk and an existing branch. If allowed to grow, your tomato plant is more likely to grow “out” than “up”, which will result in the plant needing to put more effort into leaf and branch production than tomato production. For a high-yield garden, keep each plant to one main stalk, and pinch off suckers as they appear.
Step 3: Stake ’em from the start
Our tomato plants regularly get around 8 feet tall. It’s easy, when they’re all of about 4-inches to think that the cutesy 3-foot tall plant support cages sold at places like Home Depot specifically as “tomato supports” will actually work.
But they won’t. They’re much too short. So what will end up happening is that your tomato plant will grow until it’s taken over the cutesy-little support, and you’ll have to add additional much taller stakes, but by that point, the plant is so wrapped around the original support that you can’t get it out to put something new in.
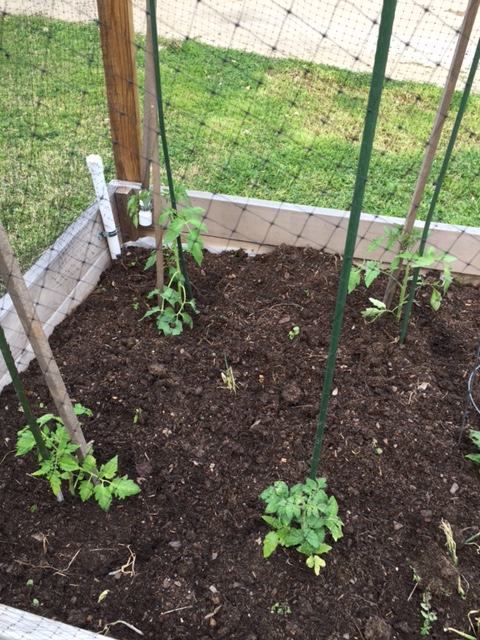
Save yourself the hassle – go with the tallest stakes you can find, from the very beginning. I generally prefer to put two 8-foot stakes together in a teepee formation, tied at the very top, over my young tomato transplants.
Step 4: No animals allowed
Birds and squirrels think tomatoes are delicious. And if given the chance, they will happily take a single bite out of each and every tomato you grow. To prevent this, you’re going to need protective netting. The net keeps the big pests out while still letting pollinators like bees and butterflies in.
You can wait to do this step until your plants actually set fruit, but I usually prefer to set up my nets from the very beginning. Again, make sure that your net clears the top of your stakes, because these plants will get very tall.
Step 5: Avoid droughts and floods
That’s pretty much it. Only other thing: water. Tomatoes need a lot of it. But they like a constant level of soil moisture level. So water regularly, and consider ways to reducing moisture fluctuations.
For example, our raised-bed is what’s called “self-wicking” and sits atop a built-in reservoir. Others choose drip lines. If you’re gardening in a container, you could try those “aqua globe” things.
This becomes even more important one fruit sets – big fluctuations in moisture levels will cause tomatoes to “crack” allowing bugs and pests to get inside your beautiful fruit. So try to keep moisture as constant as possible, and if you see a big storm in the forecast, consider pulling your tomatoes that are close to being ripe ahead of time.
And that’s about it.
Water regularly, pull off suckers about once a week, and once you have big juicy looking red tomatoes on the vine, pull them off and enjoy! If something weird starts happening (yellow leaves, fruit rot, fruit falling off) then you can always come back to the internet and poke around till you find an answer, but tomatoes are really pretty easy, and home-grown fully vine-ripened tomatoes taste so much better than store-bought.
What are your top tomato tips? Share in the comments.